7. Ensure the glass supports or spacers are in place Install new ones if
necessary. Cement the flat rubber spacers
in place using just enough cement to at-
tach the spacers. The spacers should pro-
vide equal support around the perimeter of
the glass and the spacers on the sides will
keep the glass from shifting left or right.
8. Apply ribbon sealer to inside edge of the
pinch weld (Figure 14-24). Shallow pinch welds
will require 5/16 inch x 5/16 inch size,
while deeper ones will require 3/8 inch
x 3/8 inch size. Start in the center of one
A-pillar Do not stretch the strip of sealer.
Cut the ends at a 45-degree angle and butt
together.
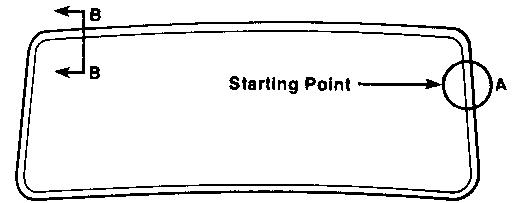
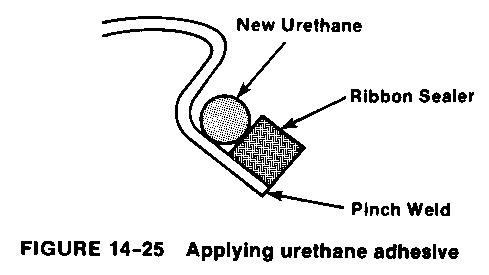
9. Apply a bead of urethane sealant around
the glass or the peri meter of the pinch weld
flange as shown in Figure 14-25. Cut the
cartridge nozzle at a 45-degree angle with
an opening to acheive a bead size slightly
larger than the ribbon sealer. Apply the
sealant directly behind the ribbon sealer
dam on the pinch weld. (Do not apply
sealant on antenna lead wires.)
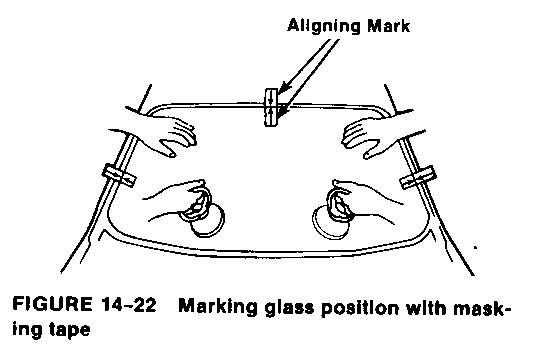
10 With the help of an assistant ,
carefully position the glass in the
body opening using the masking tape as a
guide. Becareful not to smear the adhesive
when positioning the glass. Lay the glass
in the body opening and press firmly to
properly seal the installation.
11. Paddle squeeze-out around the edge of the
glass and remove any excess urethane. If
necessary, paddle additional sealant be-
tween the glass and the car body to fill
voids. Remove masking tape and protec-
tive coverings.
12 . If the glass has an imbedded antenna that
uses a butyl strip, put additional adhesive
at the ends of the strip to get a watertight
seal.
13. Water check the installation with a soft
water spray. Do not use a direct water spray
on the fresh adhesive. Let water fiow over
the edges of the glass. If a leak is found,
apply additional sealant at the leak point.
14. Install all necessary trim parts and attach
the antenna lead and/or defogger lead.
15. Allow the adhesive to cure for 6 to 8 hours
at room temperature before the vehicle is
returned to its owner. However, since the
ribbon sealer wilt hold the windshield in
place while the urethane is curing the car
can be moved immediately
Extra tip: the urethane is messy wear gloves and protect car with masking tape otherwise you will have black stuff all over . It cleans up with thinner but be easy on paint.